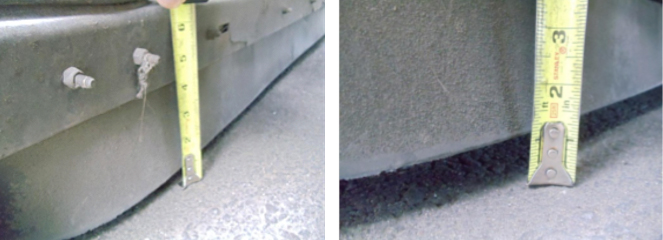
Your sweeping head and flap condition can have a dramatic impact on the sweeping and pickup power of your NiteHawk. Flaps and head should be inspected on a weekly interval – always checking for a bent or damaged head, incorrectly adjusted skids, or worn flaps. Any one of these things can lead to improper flap / pavement clearance and reduce the sweeping capability of your machine.
Proper Settings
The pick-up head flaps are in need of adjustment when there is a ¼” or greater gap between the pavement and the bottom of the flaps. (Always check to make sure your sweeping head isn’t bent, as this will require repair or replacement of the head).

Adjustment
Your NiteHawk is designed to make flap height adjustment quick and easy. As the flaps wear and a gap appears between the ground and flaps, remove the three skid/plate bolts, remove ONE of the skid spacers, and refasten the skid/plate bolts. Follow this procedure on each side of the head to allow the flaps to come in contact with the ground.

Replacement
When a ¼” or greater gap appears between the rubber flaps and the pavement and there are no more skid spacers to remove, it is time to change the flaps. Click here to order new NiteHawk Flaps and Skid Spacers.
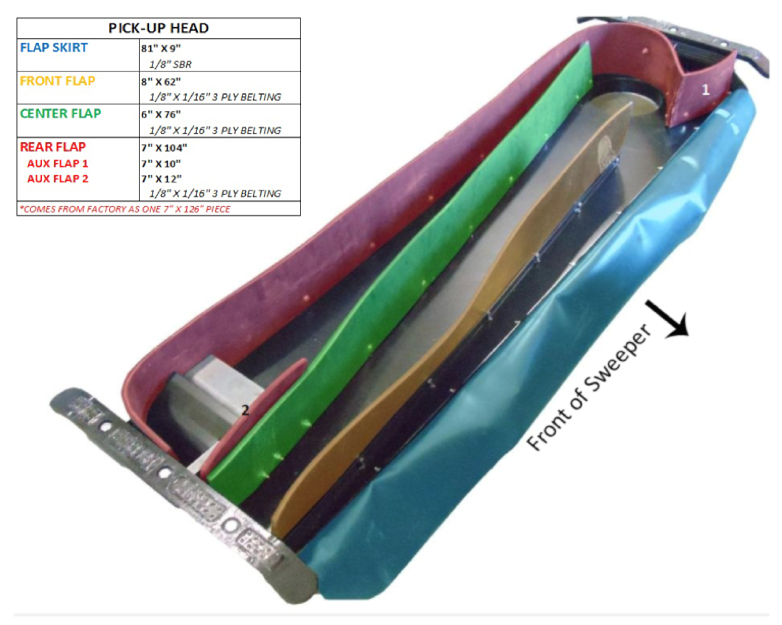
Refer to the image and instructions below to replace your flaps.
1. Remove the head chains from the cylinders, the bolts that connect the drag bars to the head, the head springs, and the 10” hoses (refer to your NiteHawk Owner’s Manual for detailed instructions)
2. Slide the head out from under the truck on the driver’s side and turn the head upside down.

3. Note that most of the bolts face toward the back of the truck. Take note or mark the bolts that face in a different direction
4. To prevent mistakes, remove one flap at a time (noting which side of the metal attachment strip the flap is located), transfer exsisting hole pattern from old flap to new, trim length if required.
5. Fasten the flaps with ¼” x 1” bolts, and nylock nuts. Install ¼” washers anywhere the flap meets a nut or bolt.
6. Reinstall rubber skid spacers making sure there are four spacers on each side of the head.
7. Reinstall head making sure that all chains are at the proper length and that the springs are set to the proper tension. (refer to your NiteHawk Owner’s Manual for detailed instructions)
If you have any questions about your flaps, the removal and installation procedures, or want to order a new set of flaps for your sweeper – contact us at 800.448.9364 or email us at [email protected]
